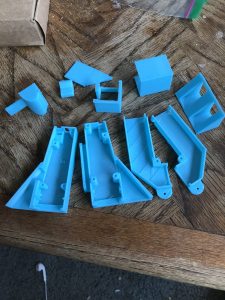
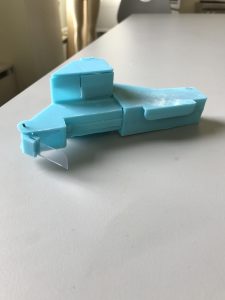
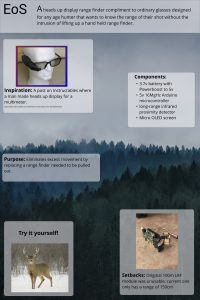
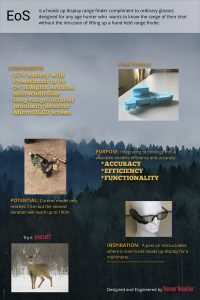
Final EoS Post

Final Form:

Final Poster:

Description:

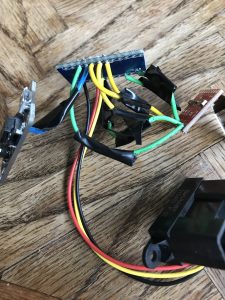
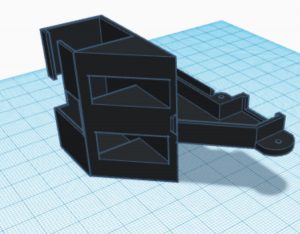
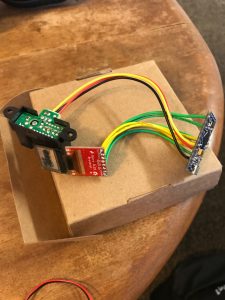
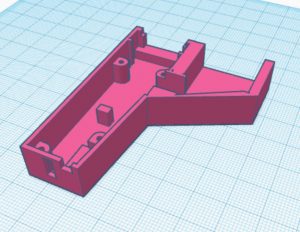
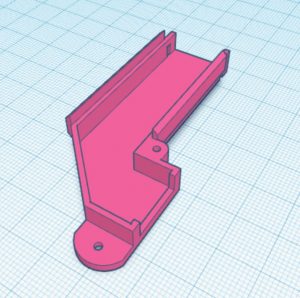
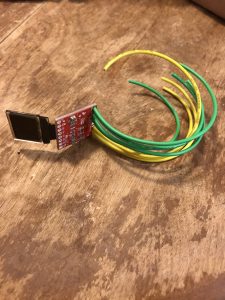
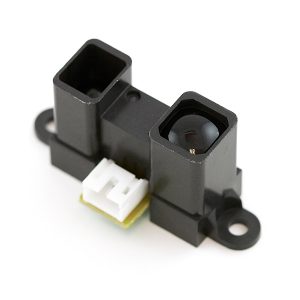
EoS has a range finder on the right hand side that transmits it’s distance to the arduino in store, which in turn displays this data on a micro OLED screen. The OLED screen is reflected off a mirror and shows up on the lens in front of the user’s eye creating a heads up display. There is also a switch to turn it on and off along with a charging port in case the battery runs out of power.

Reaction:

Overall I was very happy with how the project turned out, it was fully functional and was also fairly accurate for the range finder not having a very good range. The only problem was some people were not able to see the numbers on the heads up display which might be an issue of people having different focal lengths.

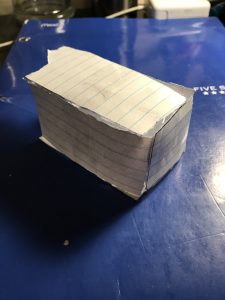
The biggest hurdle I had to overcome was the original range finder not working properly so I had to pivot to a cheaper range finder that didn’t have anywhere near the same range. Other hurdles involved not having enough space in the 3D printed housing so I had to drill out more space, and I also had to drill a hole big enough to fit the charging cord in the back of the housing.

If I had more time I would definitely redo the housing so that it would properly fit all the components without me having to drill out some extra space. I also would spend more time trying to figure out how to use the original range finder so that I could have a range that is actually practical.

But in the end I was happy with what I accomplished and it met my expectations for my first engineered project.

EoS Finale

Progress: My casing has been printed by Abrahan (thank you!) and works pretty well. I had to re-solder all the wires so I can make them shorter and take up less space in the housing. I also attached the powerboost and plugged it into my computer to test it and everything works correctly.

Setbacks: None so far (fingers crossed), I was actually surprised that the housing works out and that everything worked when I powered the final product.

This week: I just have to finish the poster and assemble the finished product, I need to find a little acrylic mirror to reflect the readings to where the lens will be for the heads up display. Finding a little mirror like that might be the hardest part but otherwise I just need to put it all together and I’ll be all set.

EoS Week 6

Progress: I was out of town for a bit of last week and the weekend so I was only able to work on TinkerCAD and I’ve almost finalized my design for the housing, I just need to add some finishing touches. I took Marianne’s idea of angling the range finder housing and it looks pretty good, it’s just a little deceiving since it looks so big but it’s actually in millimeters. Also my power boost came in the mail today so I’ll be able to work on finalizing my soldering with finishing up the power component.

Issues: The only big issue was my lack of free time to work on this the past week, but on the bright side there is not much left other than finishing the housing and printing it and soldering the last bits. We’ll see if the electronics cause any issues this week and if I need to do any last minute pivoting.


This Week: I’m looking to solder my power component in on Tuesday, which shouldn’t take too long. Then hopefully I can also finish up my housing design and get the process to print it in motion in case I need to do any changes from the first design. I said last week that I want to have it complete by Thursday and I’m still optimistic that I can meet that deadline but it all depends on what roadblocks I get with the final electronic product and if my TinkerCAD design is correct.


EoS Week 5

Progress: Everything has been soldered together aside from the voltage divider I’m going to need to make this week to power the range finder and the OLED screen. It shouldn’t be too difficult once I get the other resistor I need.

I’ve also started working on housing designs in Tinker Cad and hope to be able to print them next week. I made one option where the range finder could be on the back half of the holder, and the other option I’ll look at is if it is further up, closer to where the mirror is located (the second image).

Problems: Looking for a 5v power source I can use has been an absolute nightmare. At this point I’m leaning towards getting a battery housing and just use 4 AA batteries and hacking together a power source and have the housing open up to replace the batteries. It seems as though rechargeable 5v batteries are nonexistent, or I have to wait a month for shipping.

This Week: Hoping to finish up the Tinker Cad designs and the voltage divider so that I can print the housing and start assembling it all together. Ideally I’d like to have it functional by next week Thursday but we’ll see if I have anymore setbacks.

EoS Week 4

Progress: Soldered wires to the OLED and got it displaying the correct readings from my new range finder module. I couldn’t show it in a video since I don’t have a way to connect the wires, I don’t have a wire cutter and didn’t want to ruin the wires and re-solder them again.

Problems: None so far, just need to solder and calculate my power needs.

This Week: I’m going to solder everything together on Tuesday, so I’ll attach the Arduino, OLED, and the range finder so that I can work on the lens and the battery needed. Hopefully I can get the right battery and charger circuit Tuesday as well, getting the wrong one and frying my circuits would be extremely unfortunate. Once I get the battery and charger I can finalize the housing which I can base off of the heads up display example from my first post.

EoS Post 3

Progress: This post is in the wake of a minor setback, I was unable to figure out how to use the previous range finder after spending a week poking and prodding it with various settings. So I started my fallback plan and ordered another range finder off of sparkfun, this one goes up to about 6 feet which is decent for showing the application of the EoS. It should arrive Thursday so I’m hoping I’ll have it before class.

Problems: The biggest issue over the past 3 weeks was trying to decipher the cryptic range finder module I originally got. I’m receiving some sort of data from it but I could not figure out what it was/meant and it made minimal to no sense to me. I would get a value of 0 when measuring distance no matter what setting I’d use and I switched up to about every setting under the sun.


Plans: My plan for this week is to solder the arduino to the OLED screen and get that reading correct numbers. Then if I have the range finder I’d like to also solder that to the arduino and get the code written down. Lastly I will figure out my power needs and order the battery and the charger circuit, which when that all arrives I’ll be able to start creating some models of the casing I need since this new range finder is a different shape and size than the old one.

EoS Week 2

Progress: I was able to download some slightly questionable software from a Chinese website allowing me to find my serial port that my USB to TTL converter uses. So I stripped some wire and hooked up the transmit and receive ports on the converter to see if it would work, and my “test” did transmit and receive properly!


I then built a rough housing prototype out of simple paper and it what I didn’t even think of was how tall it was going to be. It is pretty tall for an attachment on the glasses and splitting it between the two sides won’t remedy that. It doesn’t appear to be too wide however I think splitting will ease the burden from one side to both sides of the user’s glasses.

I

Issues: Mainly the communication with the converter to the range finder is somehow not working properly and I would love to get that figured out this week so I can move on to implementing code and the OLED screen. And of course the issue of the housing should be figured out once I build another prototype housing unit that is split between both sides of the user’s glasses.

Plan For The Week: Get the range finder working, start displaying on the OLED screen and get some Arduino code put up to communicate with both of them. Also build the other housing prototype to see the difference between the two.