- An image or video
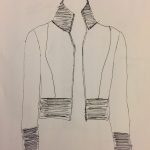
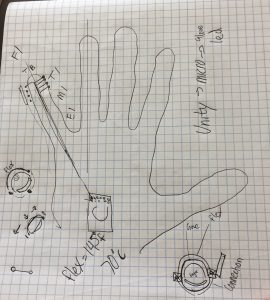 A draft that demonstrates how we want different components such as wires, microcontrollers, 3D-material holders to be built on the glove.
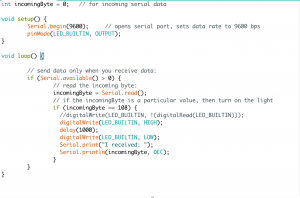 Based on the data read from serial to change the LED light to be on or off. This can be applied to reading data from Unity and turn the wires on or off on the glove.
 - A Listing of accomplishments made by all group members for the previous week
- Figured out how to use Arduino and Lilypad to read specific data from serials
- Contacted the wire company and ordered the wires
- Bought gloves and heat resistant tape
- A description of problems encountered and outstanding issues
- Still learning about Unity and how to connect Unity with Arduino
- Need to learn about sewing and how to integrate those wires and microcontrollers to the glove
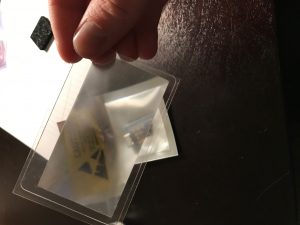
- Delayed Shipping of Flexinol Wire
- A plan for the next week of work
- The most important material — wires will arrive tomorrow. So the task for next week will be testing the wires.
- Connect Unity with Arduino
Project Post 3/7/17
Project Post 3/7/17
Since last week we’ve landed on a name for our product. We are going with “Sirena” a translation of siren in Greek. Our inspiration for the name came from the idea that this bracelet would work like a safety alarm, or siren, alerting those closest to you when you are in danger.
Emma has ordered the Simblee microcontroller off of Sparkfun and it should be here by the end of the week so we can begin moving forward with tests on that. Both Emma and I have reached out to Bellabeat and Ringly, companies designing smart tech to retrieve some information on their power sourcing and integration of Bluetooth into such small pieces of jewelry. We have begun researching the problem of sexual assault on campus through multiple documents obtained through the UW-Madison Police department. The sheer amount of documentation to look through has been a lot but we are making progress.
As soon as the Simblee comes in we hope to begin testing the Bluetooth interface with the Arduino application. If the Simblee comes in by Thursday our plan will be to work with that as much as possible. The plan is to write out our prototype layout for the Simblee, vibration motor, surface mount LED, and battery by Thursday so we can start to lay the real thing out as soon as possible.
This our links to the two companies we have reached out to for information about their products. They have also served as a great inspiration for us moving forward.
Emma Boykin
Keegan Moldenhauer
Project Post #1
Lauren Frecka 3/7/17 Post
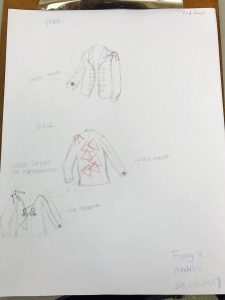
- Lauren accomplished:
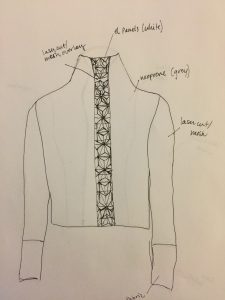
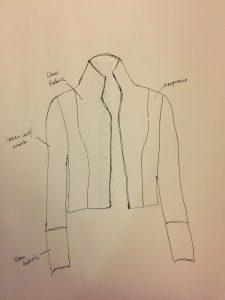
- received prototype jacket in the mail
- el panel from adafruit is on its way
- Super exciting– got an email back from Lunabrite and they are sending me a discounted sample pack for $15! Really excited to get the product in the mail
- began sketching different design options
- A description of problems encountered and outstanding issues:
- began to get a bit frustrated and overwhelmed with the sketches since there are so many different designs I could potentially do
- A plan for the next week of work:
- Work with prototype jacket– rip it, study seams, etc.
- Get help on how to connect a light sensor to the el panel when I get it in the mail
- Start designing a pattern/design on Illustrator for the laser cutter. (Might need help when I get to the Illustrator part)
- Find out what textiles will work best for all parts of my project and begin to buy them
- pick a name to call the jacket
Muscle jet-Post #1
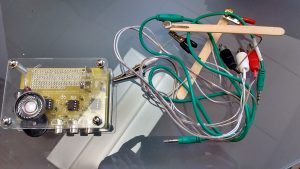
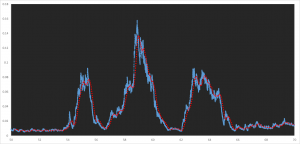
- Data Processing
with a very simple EMG system the force was recorded from my right arm lifting a weight.
initially raw data:

next step in to make all values positive:
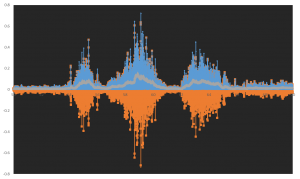
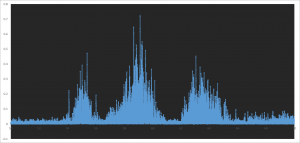
Finally using different types of filters the data was smoothed out:
- The leap time for the EMG sensor is 1 +1/2 months, so I’m looking in to local solutions in the mean time I borrowed some lab equipment from a friend.
- Next week the fiber optic will be here and I’ll start doing some test with it
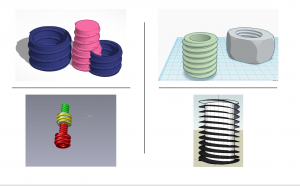
Computer Aided Disappointment (CAD)
- Last week
- I have successfully built many CADs and worked with others to design images for the heel components. Unfortunately, none of them are correct or complete. Things I have done to improve my skills on the software include completing many of the TinkerCAD tutorials, as well as watching many YouTube videos on SketchUp. I find that bouncing between platforms has helped me to learn them faster, yet I am still not great at either. I have also recruited help, but unfortunately the images are still not what they need to be.
- This week
- Tuesday: Continue working on 3D modeling
- Thursday: Begin working with Adafruit Bluetooth component
Unconventional Honesty Post 1
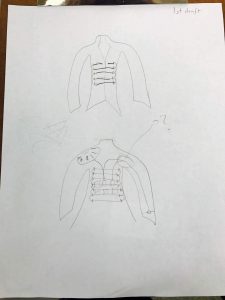
Progress: Most of this week finalizing our design, mapping the wires, and ordering our final project pieces due to our lack of physical items. Our main issue is our lack of items, but we’ve been working around that by figuring out solutions to possible problems before they arrive. In example, we have been thinking on jacket construction and how we will create our final prototype. Instead of building the jacket from scratch, we will build on top of a hacked jacket.
Issues: As previously stated, the main issue has been the lack of products to actually work with, but our order of neopixels has been placed!
This Week: We will finalizing our mapping plans and beginning our programming sequences. We will also begin to look at possible jackets to build on top of.
EoS Week 1
EoS Project By Konnor Beaulier
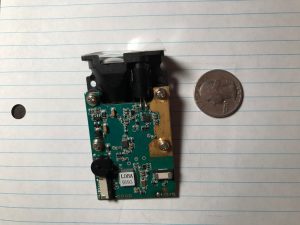
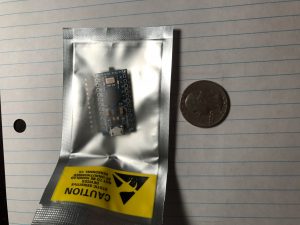
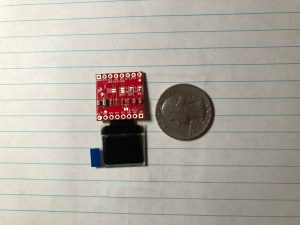
Progress: All of my parts arrived! The best part is that the LRF module, Arduino, and OLED display are much smaller than I anticipated, however after drawing up some rough placement plans I can see that the width may in fact still be an issue. If width does prove to be a problem I can then look at the fallback plan of splitting the device on both sides of the glasses and figuring out what I need to use to connect the two sides.
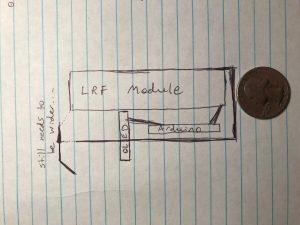
LRF module
Arduino micro pro
OLED display

Issues: The lenses I have are excellent at reflecting light so I think they’ll work well for the OLED display, however my only concern is looking through them is a real eyesore. This may not prove to be a problem depending on how small I can make the display, but if it is too big and is a real nuisance then I may need to find a different lens to use.
Next: I don’t have wires small enough to test my electronic components so I’ll be looking to either get some in class or pay a visit to the engineering building to try and get some if possible. Once I get those I’ll be able to hook up the Arduino and the OLED display to get that displaying properly and will even be able to work on getting the readings from the LRF module which is great.
Adjustable Shoe – Blog Post #1
Project Title: Adjustable Shoe
Project Team: Rachel Stern
Project Description:
- Professional wear shoe that has a heel that changes height. The user can adjust the heel at 0.5” increments from a flat shoe (0.75” heel and 0.5” platform) to a high heel (4” heel and 1” platform).
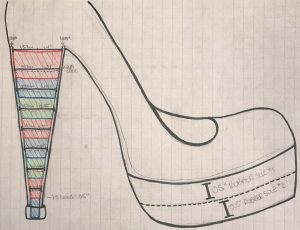
Sketches/Concept Art

Materials and Costs
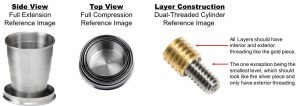
- Heel
- Concentric funnels
- Original Prototype: 3D Printed Plastic: $2.50/part + $0.49/material cm3
- Once the design is finalized, parts will be reordered, likely in titanium; decision pending final cm3 as this will determine overall cost.
- Dual-Direction Rotator and Motor: TBD based on final material selection.
- Concentric funnels
- Platform
- Rubber sole
- 3D Printed Plastic: $2.50/part + $0.49/material cm3
- Rechargeable (via USB) battery
- Lithium Ion Polymer Battery – 3.7v 500mAh – $7.95
- Bluetooth receiver
- Adafruit Feather 32u4 Bluefruit LE – $29.95
- Feather Stacking Headers – 12-pin and 16-pin female headers – $1.25
- Shoe Shell
- The portion will be created with found parts and fabric that I own. The approximate cost of these items was $20.
- Rubber sole
Timeline (*short timing to allow for extra time to be added in weeks that require it)
- w/o 2/27: Finish CADs for concentric dual-sided threaded rings and order 3D prints.
- w/o 3/6: Determine proper motor and rotation mechanisms to operate heel movement; order and test parts.
- w/o 3/13: Build platform elements and test functionality: battery and charging housing in upper platform and movement track for lower platform.
- w/o 3/20: Build shoe skeleton using heel and platform prototypes and found materials.
- w/o 3/27: Incorporate Bluetooth technology to operate heel movement.
Fallback Plans
- Lower the overall height of the heel/ platform to reduce cost and possible structural issues.
- Change heel to platform to resolve any design issues.
How to make a video post
This post documents how to create a post for your videos. The first step is to create a new post. You can do this by pushing the new button at the top of the screen.
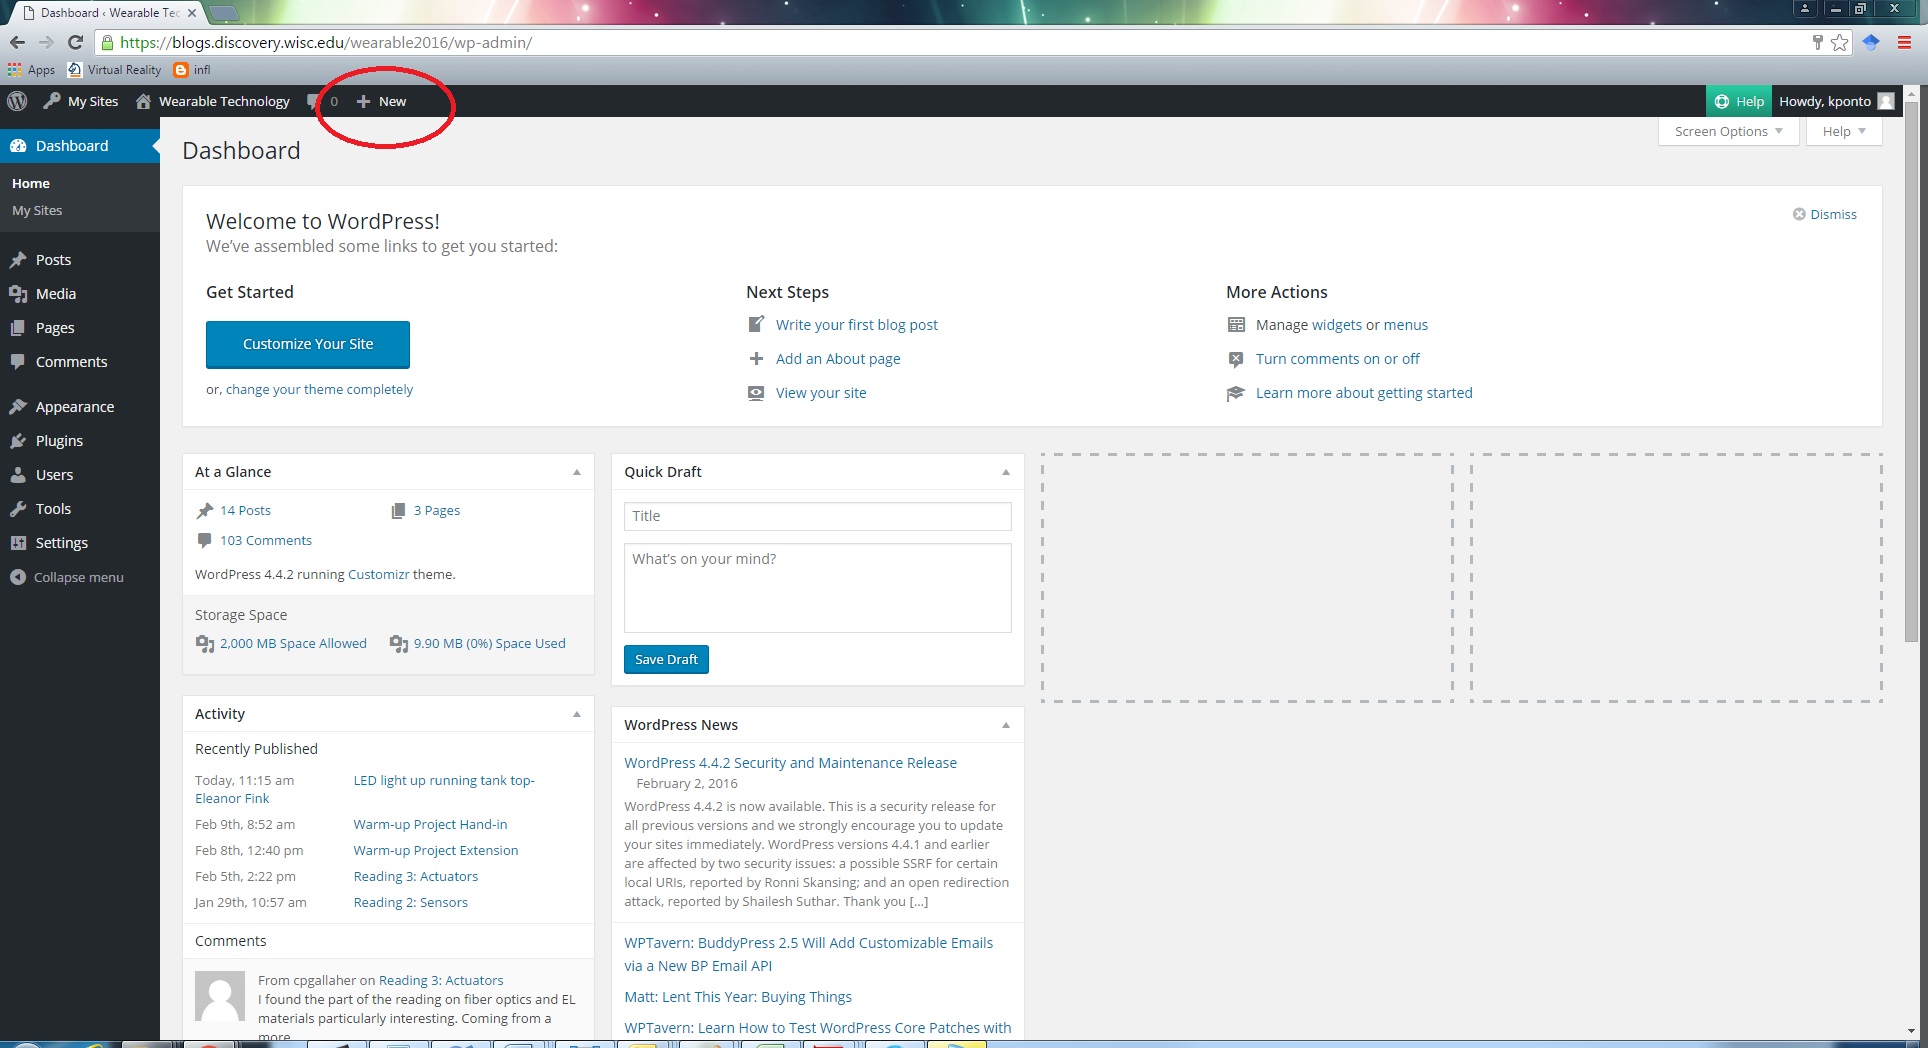
Next, you can choose the category for the post. For the warm-up project, choose the warm-up project checkbox.

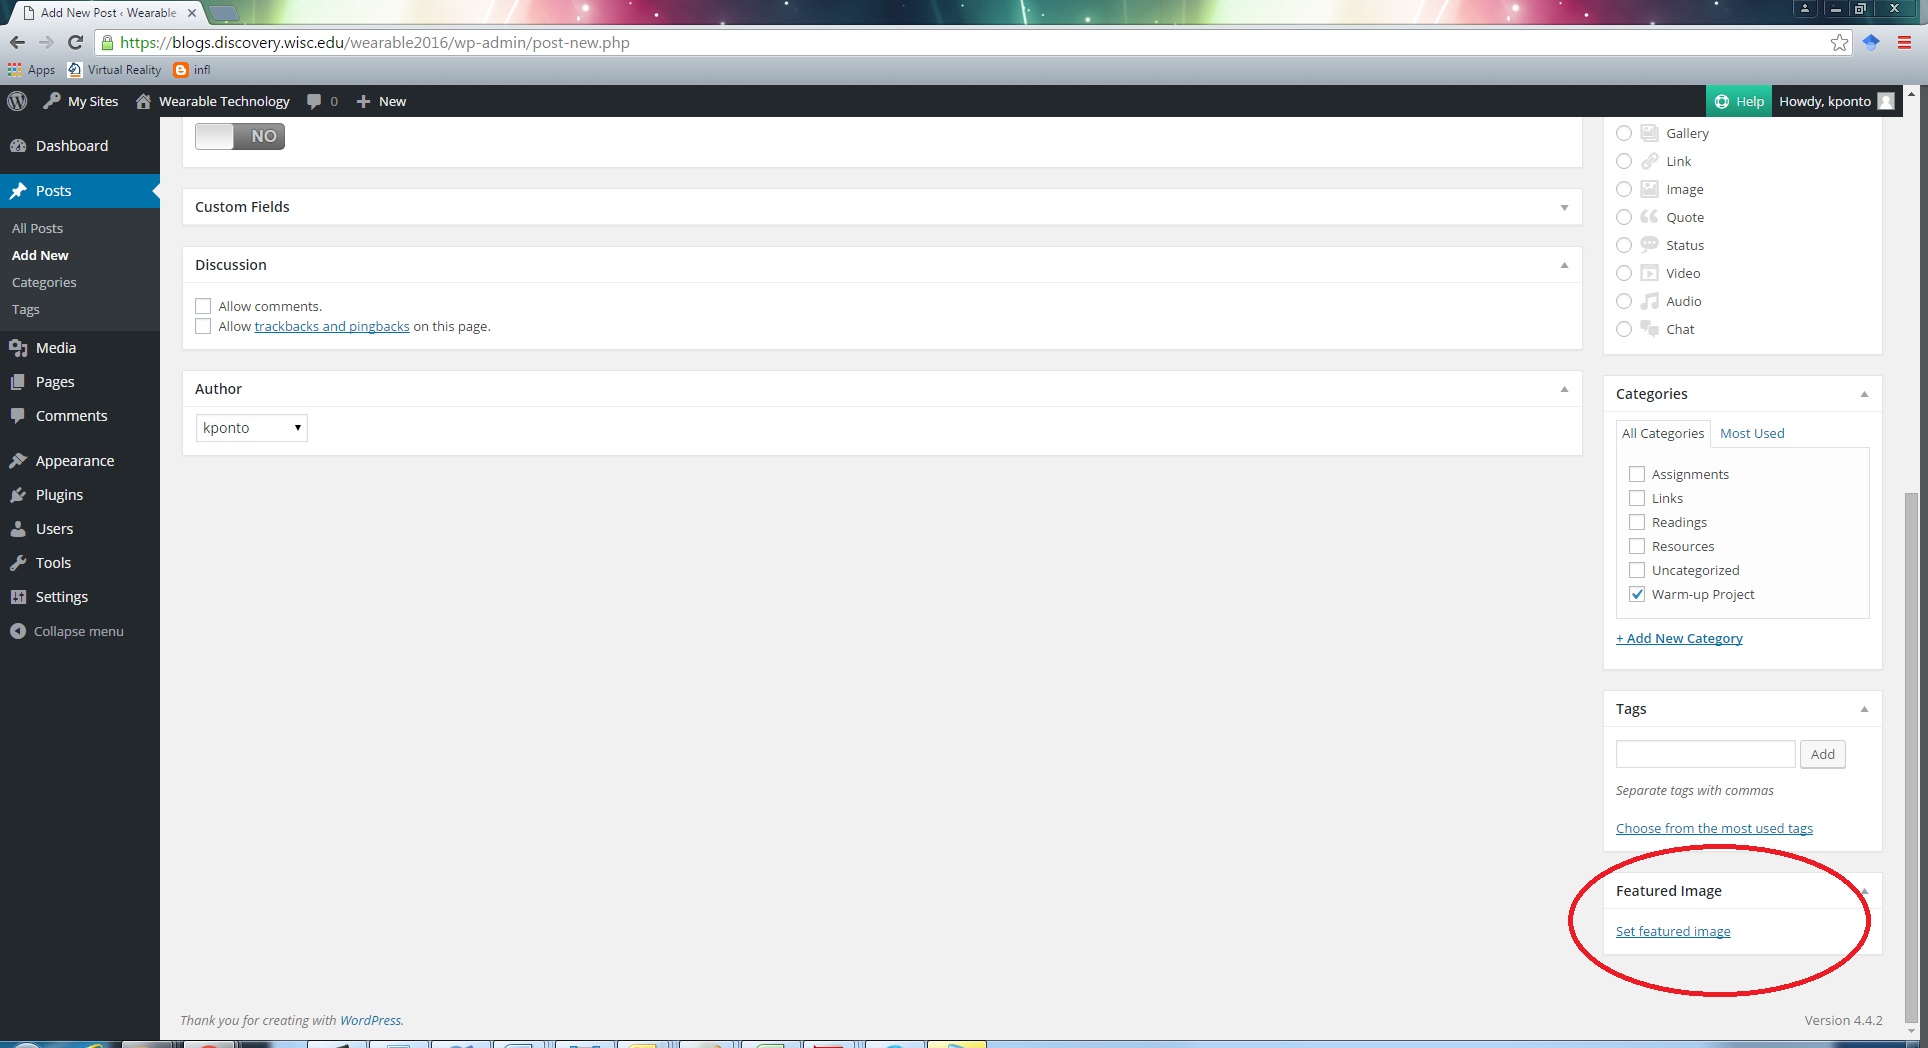
If you want to add an image for the front page to make the post look better, you can do so by setting the featured image.
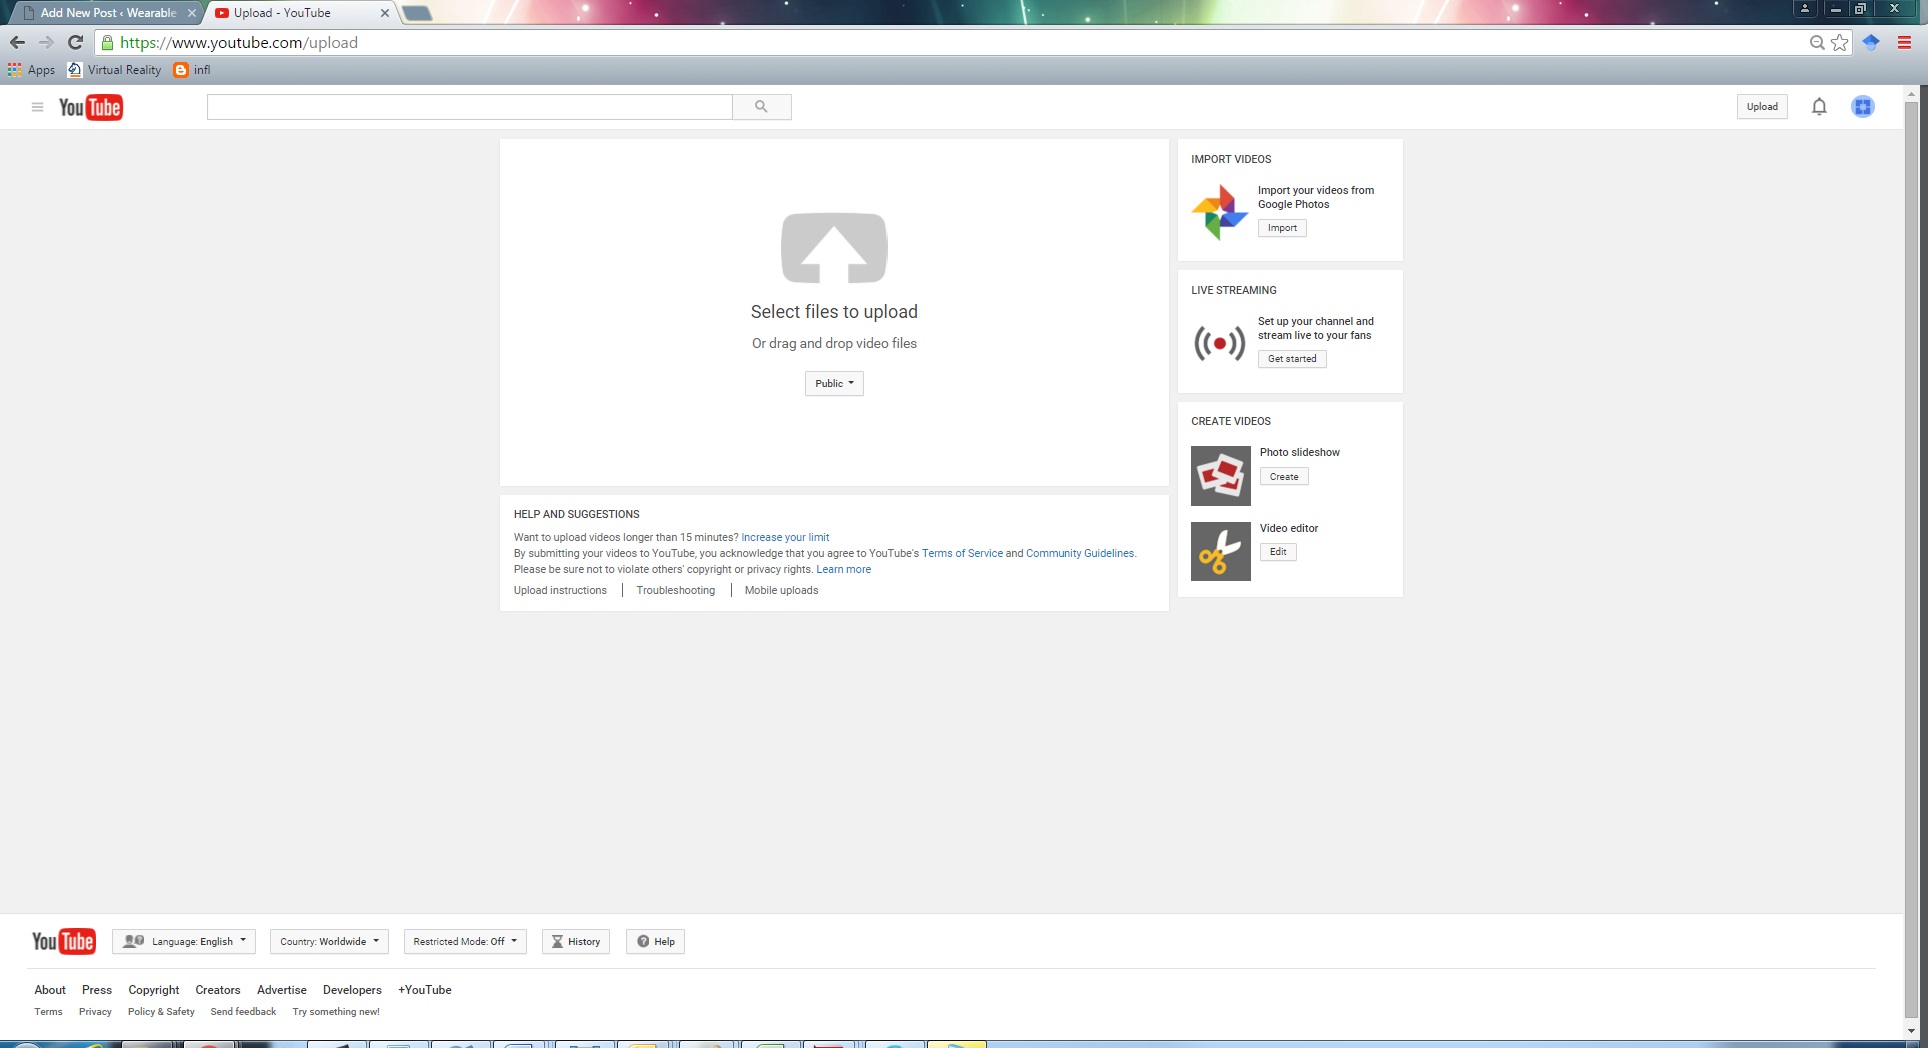
Now you need to add your video. The easiest method is to use youtube, but viemo and other services work in a very similar manor. First upload your video:
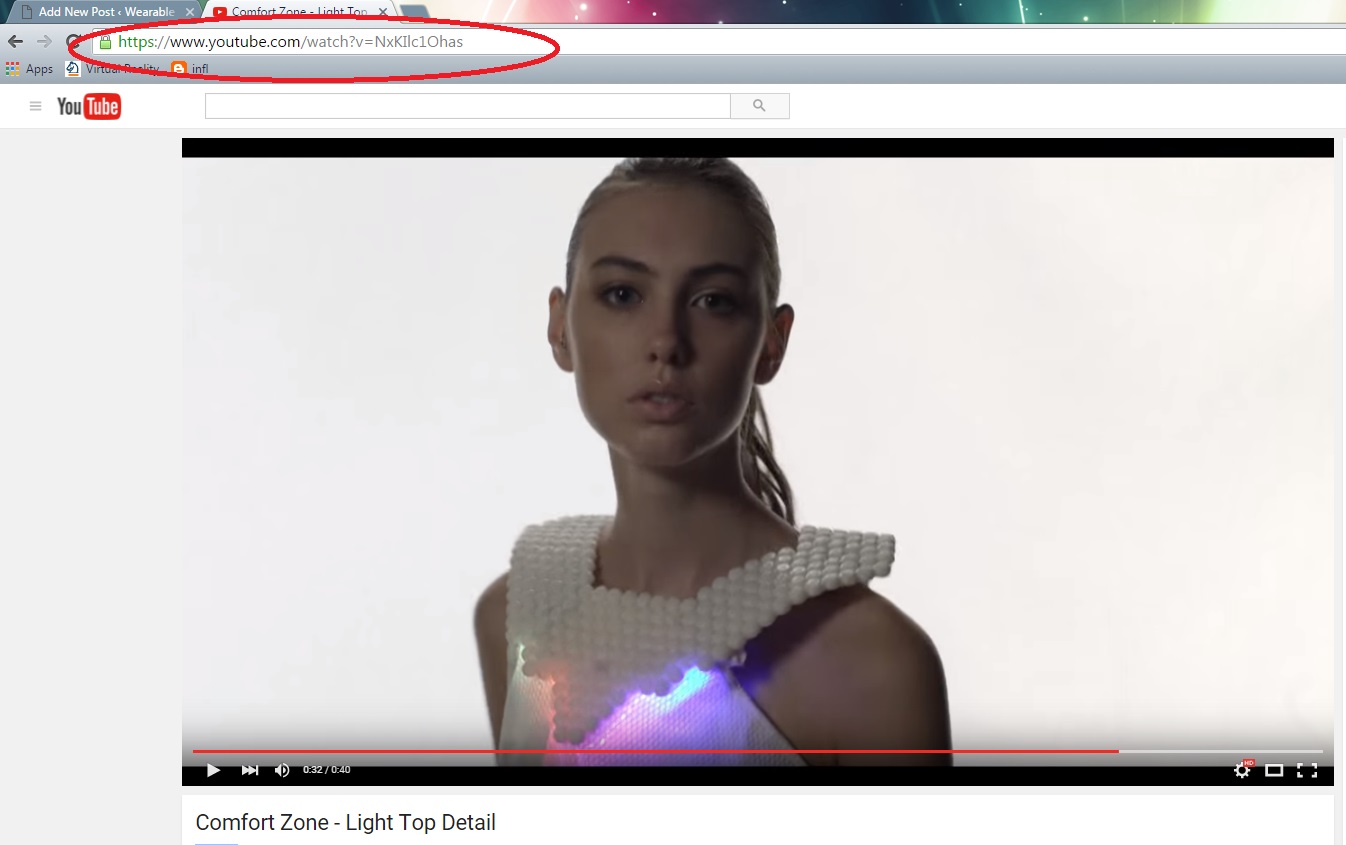
After the video has finished, copy the URL for the address of the youtube video page.
Now paste that URL into the post
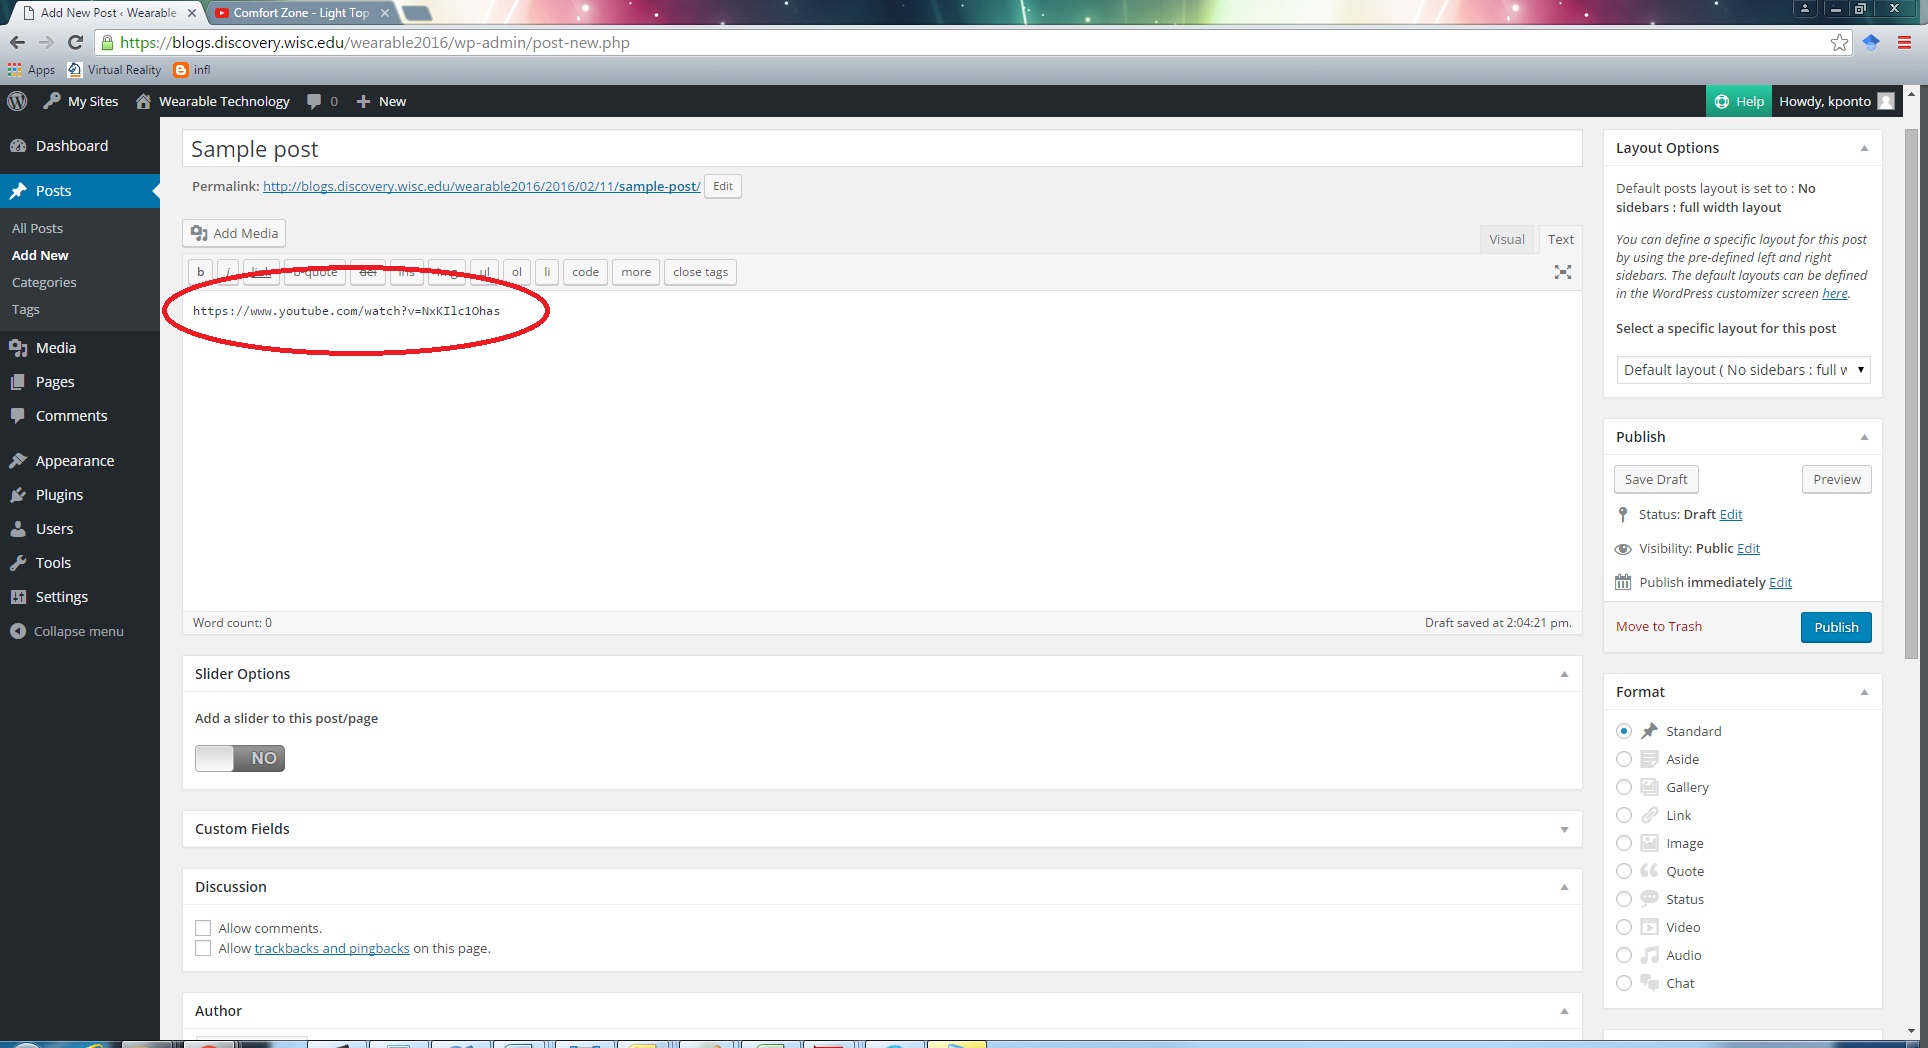
and the video should show up automatically
When you are finished, push the publish button
Muscle Jet-Project planning
Muscle Jet
Abrahan Bechara
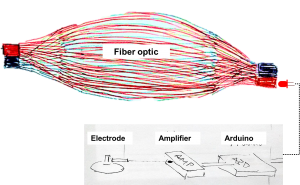
Project Description: Long sleeve T-shirt that shows through color changing light the force generated in a group of muscles.
Fun experimental project: Showing EMG data through a color changing scale is something that has not been done before, and has a few interesting challenges. One of them being the incorporation of fiber optics in to the fabrics.
The circuit will be very simple:
The overall structure will be:
Materials:
-Fiber optic
-Wool
-RGB led
-EMG electrodes
-Amplifier
-Arduino
-Sports T-shirt
-Maybe (Screen print)
Timeline:
| What | When |
| Material purchase | March 2 |
| Code + Concept test | March 7 |
| The technology for the project is shown to work | March 16 |
| First prototype (Functionality) | March 28 |
| The technology has been shown to work in a wearable configuration | April 6 |
| Second prototype (Efficiency) | April 13 |
| Feedback and refinement | |
| The technology and final wearable are fully integrated | April 20 |
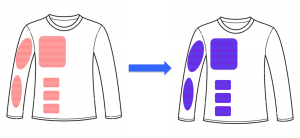
Fallback: The signal acquisition will be the biggest challenge, if I cannot solve it them I would have to do a completely different project trying to incorporate the fiber optic and light display.
My plan B idea is a cycling aid belt that signals direction and stopping; the image below shows the configuration.
