Aurora Jacket 4/25

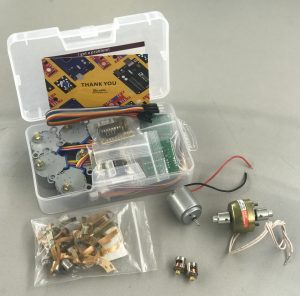
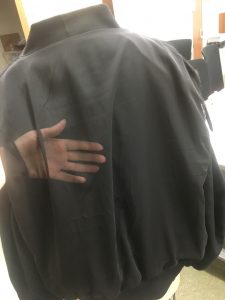
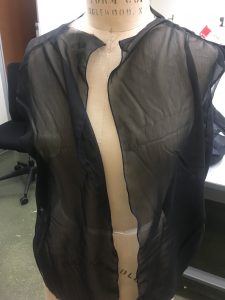
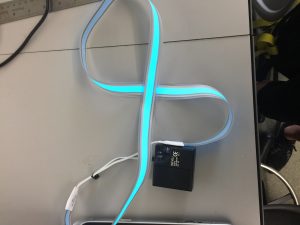
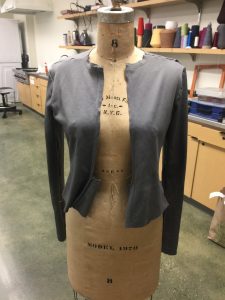
I have all of my materials now except for a zipper. Last Thursday I learned to sew a jacket together and did two prototype jackets. This weekend, I got all my final materials in the mail including the vynel el panel strip and my neoprene fabric is out for delivery (again) today. I had to sign and pay a postage fee in order for it to be delivered…

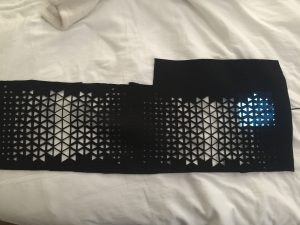
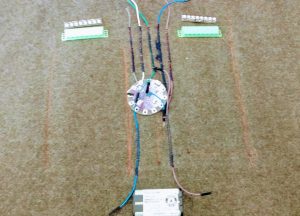
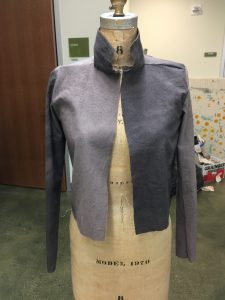
I have extra material that I will sew together today exactly like how I will want my final jacket to look. I need to practice how I will connect the sleeve cuffs and collar. I also need to set the el panel to the light sensor I have and get that up and running. I will make plans on how I’m exactly going to integrate the glow fabric and el panel in the final jacket. The battery pack I received in the mail makes a high pitched noise when I turn it on so I will need to troubleshoot that as well.

Aurora poster rough draft

Sirena Post #7

Emma was able to come up with a new design for the bracelet, deciding to make it into a cuff and have all of the pieces put together and printed all at once instead of in pieces.  Keegan was able to help with making the design come to life using NX in the ME building. The bracelet is still printing and will be ready in 5.5 hours as of now.

We also decided to add a circular part to the top of the bracelet that can hopefully be pushed down onto the button for the 3 seconds.


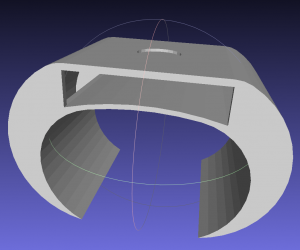
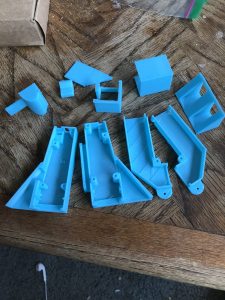
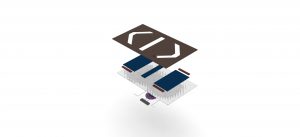
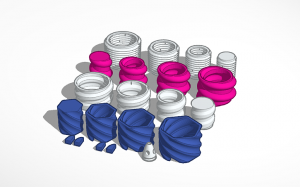
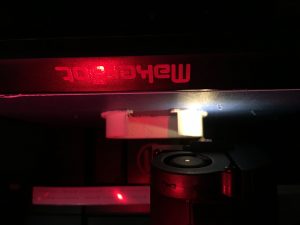
Once it finishes printing, the next steps are to evaluate how well the tech will fit inside of the new design and go from there. Hopefully we won’t have to print another one but if we do, we would have to have it done by Thursday night.
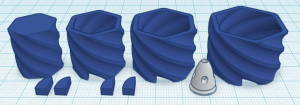
 

This week Keegan kept working on the Simblee application for Sirena. Coming down on our last week we’ve decided to go to our fall back plan for the app. Right now the idea is to create a dummy app that will look like a functioning app and an alert will pop up when the button on the bracelet is held saying that you have sent a text notification, but with limited time and coding knowledge the app will not actually send an email or text, it will just look like it did. I hope to get that functionality put in to action by Tuesday or Wednesday of this week and can take one last crack at trying to send an email for some proof of concept.

Emma was also able to get the poster ready…all we need is images of the final bracelet which we don’t have just yet.                               

Heels Up!

  • Naming
    •  Houston we have liftoff! Inspired by the aviation phrase, “wheels up”, that signifies that a plane has taken off, “Heels Up” is meant to evoke that with this product women are ready to “take off” on whatever adventures the day holds. Young professional women often travel frequently both for work and for pleasure, so they will be familiar with the term, and that duality also plays nicely into the fact that the shoe can be for either work or pleasure.
  • Heel Components
    • The final heel components seem to be working, the next step here is adding one of the many motors that I purchased (with Kevin’s help please).

  • Shoe Body
    • Once we are “Heels Up”, the shoe body will be specially constructed to fit the heel. If we don’t have a working heel prototype by Thursday, the shoe body will be constructed anyways.

Unconventional Honesty Post 6

Progress: With all the wiring done, all that was left was the creation of the organza vest. After a small set back, the correct black organza has been purchased ($24) and the first layer of vest has been sewn on. The second layer is sewn together and ready to be attached.

Setbacks: The original organza was far too thin and we had to scrap the tunnel idea. Otherwise, no other major setbacks.

This week: All that is left for the jacket is to attach the heart rate monitor, wire the jacket, and then sew it all back together! We will also finish up our poster this week.

EoS Finale

Progress: My casing has been printed by Abrahan (thank you!) and works pretty well. I had to re-solder all the wires so I can make them shorter and take up less space in the housing. I also attached the powerboost and plugged it into my computer to test it and everything works correctly.

Setbacks: None so far (fingers crossed), I was actually surprised that the housing works out and that everything worked when I powered the final product.

This week: I just have to finish the poster and assemble the finished product, I need to find a little acrylic mirror to reflect the readings to where the lens will be for the heads up display. Finding a little mirror like that might be the hardest part but otherwise I just need to put it all together and I’ll be all set.

Aurora 4/18

I recieved my samples in the mail that I ordered to make sure it was the correct neoprene. It is! So I will go ahead and call the vendor today and order the yards that I need with the free expedited shipping I was offered. I also recieved the turqouise luna gel glow fabric in the mail for the final product.

Last week I measured and cut out the pattern for the jacket and completed the laser cut patterns in Illustrator.

This week I am going to sew my prototype jacket together and troubleshoot any issues I run into with that. I will also order my final el panels today.  I will test my light sensor this week as well.


Bike post#2

This is the lay out of the electronics and other components.

This is the real one

Last week I finished sewing the FO fabric

front

back

This week Ill finish sewing the rest of the circuit

and cut and engrave the leather.

Haptic Glove Beginning of the End

A Listing of accomplishments made by all group members for the previous week

  1. Learned about the leap motion and its implement in Unity
  2. Changed our plan to use rumble motors to guarantee the stability


A description of problems encountered and outstanding issues

  1. What kind of gloves should we use?
  2. How many microcontrollers should we use?
  3. Switching the Arduino code to python to get ready for the raspberry Pi http://playground.arduino.cc/interfacing/python


A plan for the next week of work

  1. Learn about the method and function to create the collision effect in Unity
  2. Implement the rumble motors on the gloves
  3. Finish the gloves housing and begin final calibrations to best create the haptic feedback.

One Last Shot at CAD

  • Last week
    • I designed several more iterations of the heel components using various TinkerCAD shape generators. I came into a few issues with the fact that I was using generators made by the TinkerCAD community, so when I would try and modify the designs, I would encounter glitches in the design. I was finally able to get a few versions that I feel good about and  sent them to the printing department on Saturday, but they will not be ready until tomorrow. All of the designs involve a tapered shape so that when a layer is extended downwards, it cannot fit through the bottom of the layer outside of it.

    • Additionally, with one of the designs I tried to design a stop to catch the layer when it is wound back up.

  • This week
    • Work on motor functionality and put the final shoe together.

Sirena 4/18/17

Emma was able to get a much better idea of sizing this week. After 3D printing the base and one side, she realized the sizes should be a little bit smaller. The pieces actually came out really nicely and they were sanded down pretty well. Nonetheless, they are far too big and need to be re-worked yet again. Even though the big pieces are going to be used for the final, it is still nice to get an idea of the shape even if its a little too big. Emma also switched over to using NX instead sketch up because the dimensions are a lot easier to work with on NX. She plans to continue to work on sizing this week and work through the challenges faced last week.

Keegan worked on the NX files with Emma last week. The sketch up file had to be redone in NX to allow editing as well as exporting. Keegan continued to work on the app through Ionic Creator. The use of Ionic is proving to be more difficult than anticipated and has slowed down, but will be getting more focus this week and moving forward.

We’ve seen some challenges with coding and the 3-D printing of the Simblee housing. With 3-D printing we are able to rapid prototype our design and see where problems are, fix them, then print a new model quickly. By constantly adjusting our design we hope to get our best possible model as quick as possible.